Migrating from Cloudways to Hostinger: A Real-World Troubleshooting Guide (Save 70% and Boost Speed!)
If you’re running a profitable WordPress blog, you’re always looking for ways to maximize speed and minimize costs. I recently decided to make a big move: migrating my primary English blog, dailypickstoday.com, from Cloudways (a great but pricey managed host) to Hostinger’s new Business plan (NVMe SSD storage, much cheaper, but slightly more complex technical setup).

My goal was to cut my monthly hosting fee from $11 down to about $4, while keeping the speed I love. While the file transfer was smooth, the DNS propagation process turned into a 10-hour troubleshooting marathon.
My goal was to cut my monthly hosting fee from $11 down to about $4, while keeping the speed I love. While the file transfer was smooth, the DNS propagation process turned into a 10-hour troubleshooting marathon.
My goal was to cut my monthly hosting fee from $11 down to about $4, while keeping the speed I love. While the file transfer was smooth, the DNS propagation process turned into a 10-hour troubleshooting marathon.
My goal was to cut my monthly hosting fee from $11 down to about $4, while keeping the speed I love. While the file transfer was smooth, the DNS propagation process turned into a 10-hour troubleshooting marathon.
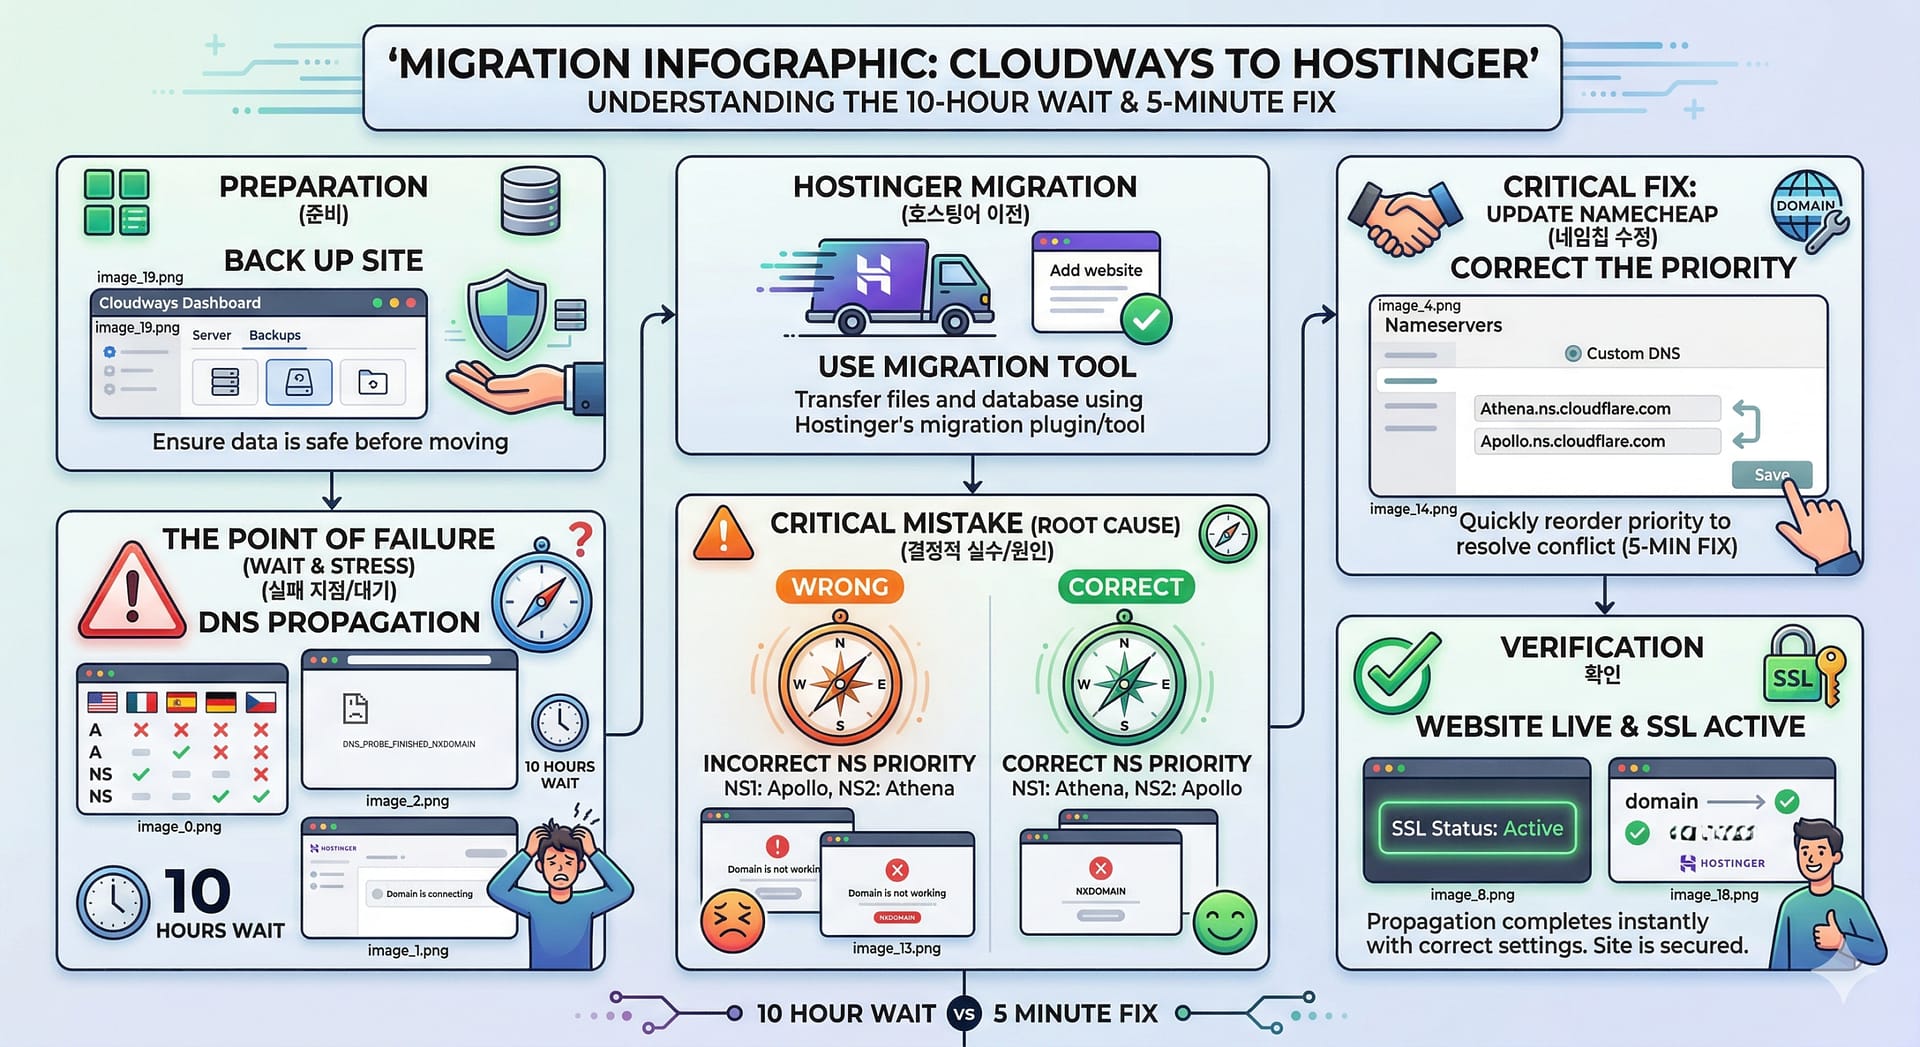
Here is my experience, the critical mistake I made, and the 5-minute fix that finally made the site go live.
Part 1: The Trap of DNS Propagation (The Waiting Game)
The most stressful part of a host migration is waiting for the world to know you’ve moved. I started by using Hostinger’s built-in migration tool to copy the files, which worked perfectly. The real challenge began when I pointed my domain, dailypickstoday.com, from my Namecheap registrar to the new Hostinger servers.
I set the Nameservers in Namecheap and was told that propagation can take up to 24-48 hours. So, I waited.
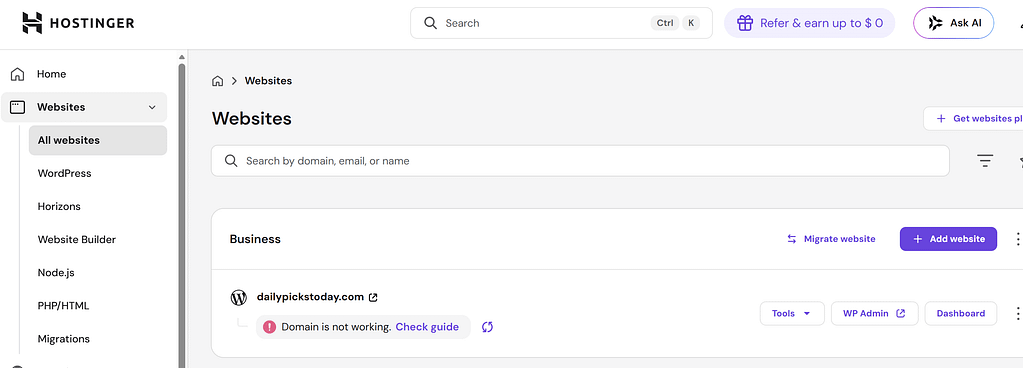
But after several hours, my Hostinger dashboard continued to show a frustrating grey “Domain is connecting” message.
When I tried to check the site, I got a browser error that every migrator dreads: DNS_PROBE_FINISHED_NXDOMAIN. This basically means “I can’t find this domain.”
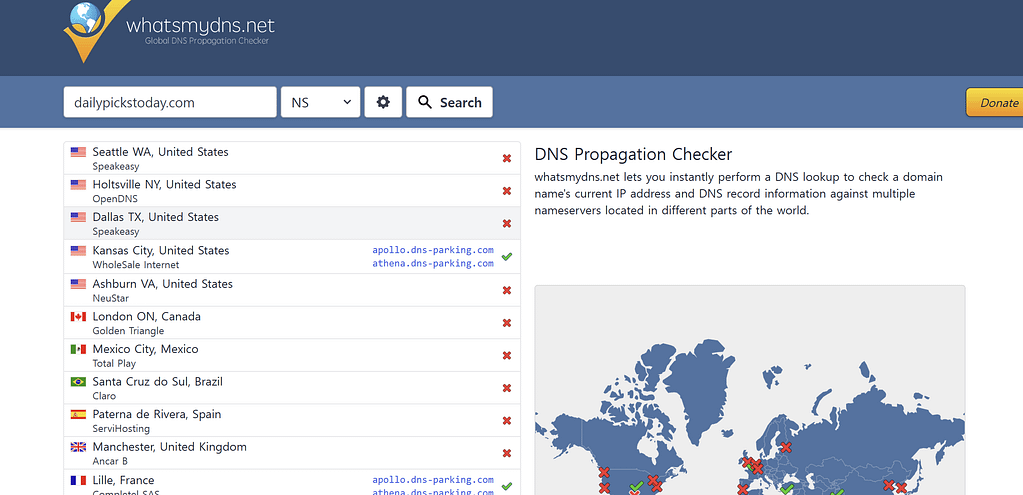
When I checked a global DNS propagation tool (What’sMyDNS), I saw a weird split. The Nameservers (NS) looked propagated in some places, but others still held the old Cloudways information. This is called “flickering.”
Part 2: The Critical Mistake I Made (A Nameserver Priority Issue)
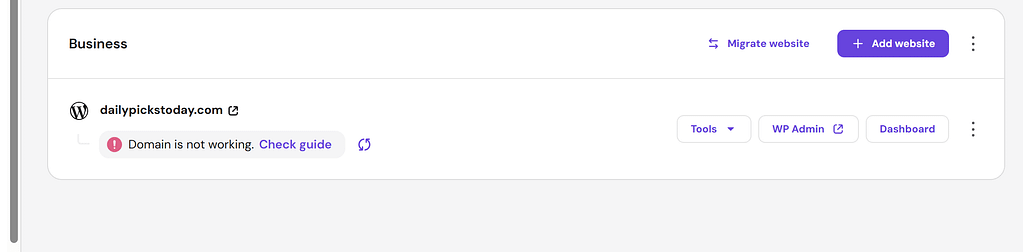
My status in Hostinger soon turned from grey to a frightening red “Domain is not working.”
I reached out to Hostinger’s live chat (Kodee) for help. This is where the confusion set in. Hostinger assigned my high-performance Business account to use their advanced nameservers: athena.dns-parking.com and apollo.dns-parking.com.
I had entered these in my Namecheap “Advanced DNS” section, thinking that was the right spot.
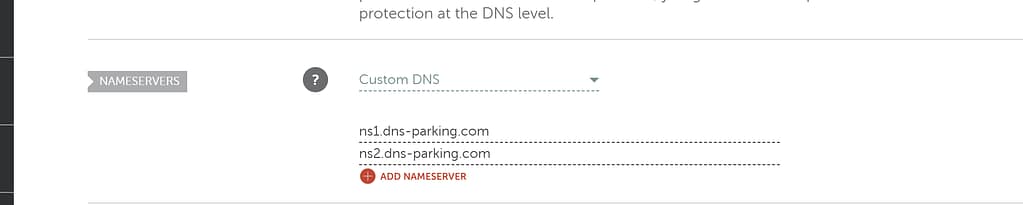
But the true mistake was not just where I entered them, but the order of priority. I had set Apollo first and Athena second in my Namecheap dashboard.
Kodee, the Hostinger support agent, identified the root cause:
Kodee: “I checked your domain, and the nameserver setup is NOT normal. You set Apollo and then Athena, but Hostinger requires Athena to be the primary (NS1) and Apollo to be the secondary (NS2) for this specific server group. This order mismatch is preventing our system from finding your domain.”
I had to correct the nameservers in Namecheap immediately. But since I had been fiddling with the settings, some DNS servers had already cached the wrong priority, causing the “flickering” propagation I saw.
Part 3: The 5-Minute Fix (How to Restore DNS Order)
This is the fix that made my site go live instantly:
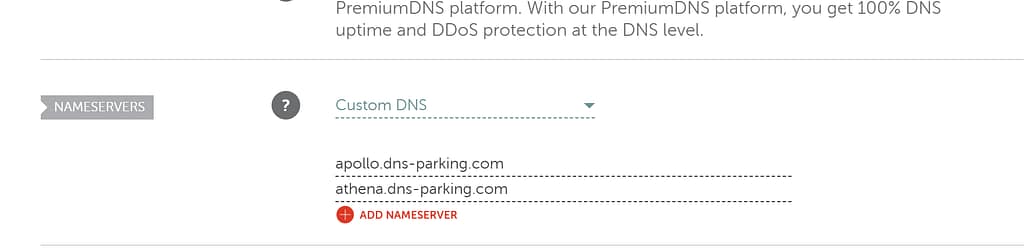
1. Go to the correct Namecheap section. Do not use “Advanced DNS.” Go to the main [Domain] tab, find the NAMESERVERS section, and select Custom DNS.
2. Enter the Nameservers in the correct priority order (Crucial!):
- NS1:
athena.dns-parking.com - NS2:
apollo.dns-parking.com
3. Save your settings (✅).
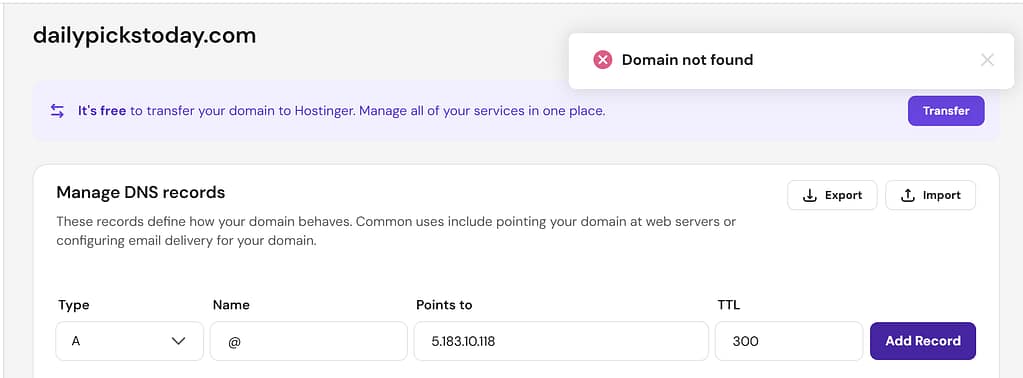
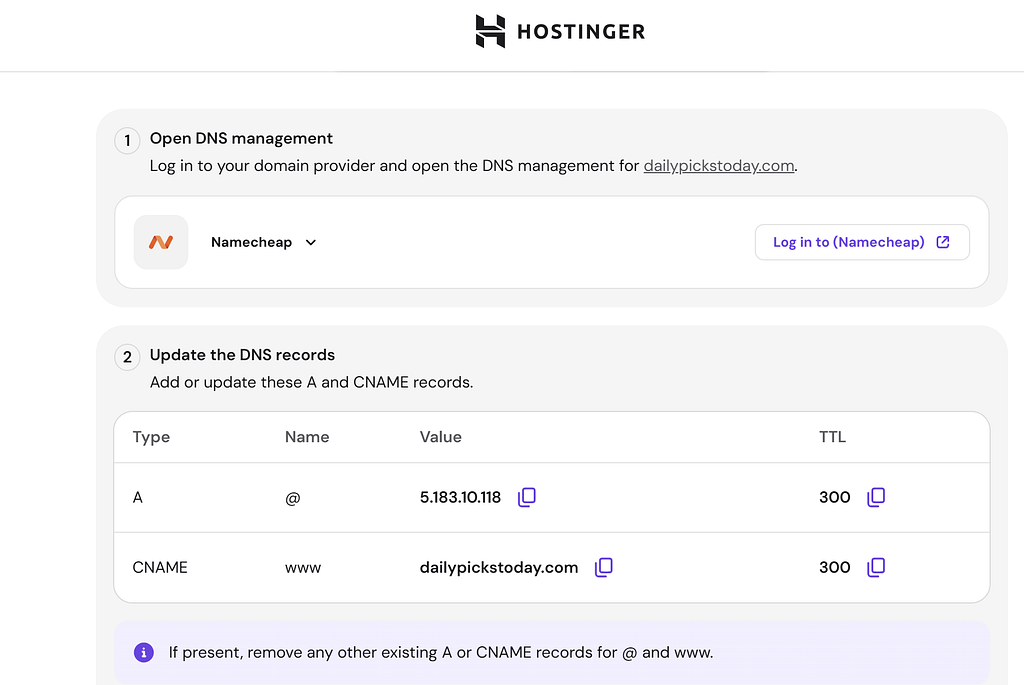
Once the Nameservers were corrected in the primary position (NS1: Athena), the Hostinger system finally recognized the domain, and the DNS Zone Editor was unlocked. I then manually pushed the final A-record and CNAME settings that Kodee had recommended to speed things up.
Part 4: The Final Review: SSL and Speed Boost!
Within 5 minutes of setting the correct priority, the red “Not working” message disappeared. I refreshed the hPanel dashboard, and my site was live.
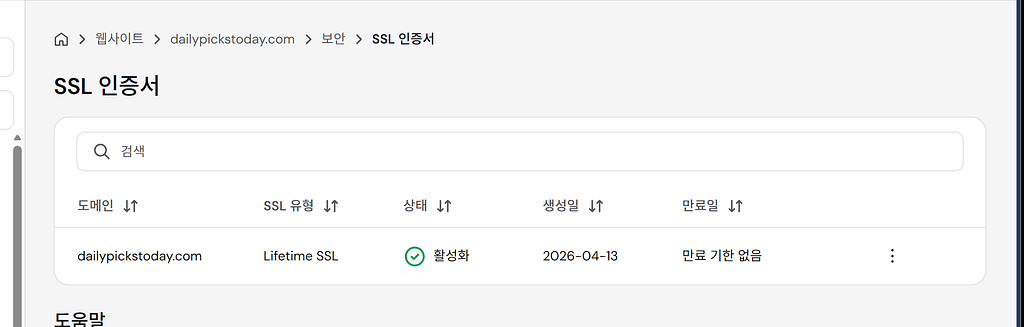
But the site didn’t have the secure padlock icon yet. Now that the DNS was pointed correctly, I went to Hostinger’s Security menu to Install SSL. Since the domain was now active on their server, the installation took only a minute and was set to “Lifetime SSL” for free.
Was the Migration Worth the Troubleshooting?
Yes! The speed is excellent on Hostinger’s NVMe servers. Here is my final post-migration checklist:
- [x] Correct Nameserver Order: NS1 must be
athena.dns-parking.comif assigned. - [x] Manual DNS Records (if needed): A record (
5.183.10.118) and CNAME (www). - [x] Install Lifetime SSL: Don’t forget the final padlock!
- [x] Delete Old Cloudways Server: Stop the billing!
Migration can be stressful, but the precision of nameserver assignment is usually the key. Always double-check your NS priority! If you are stuck in a propagation loop, your nameservers might be technically correct, but the order could be confusing the system. Correct that, and you will cut days off your live date. Happy blogging!
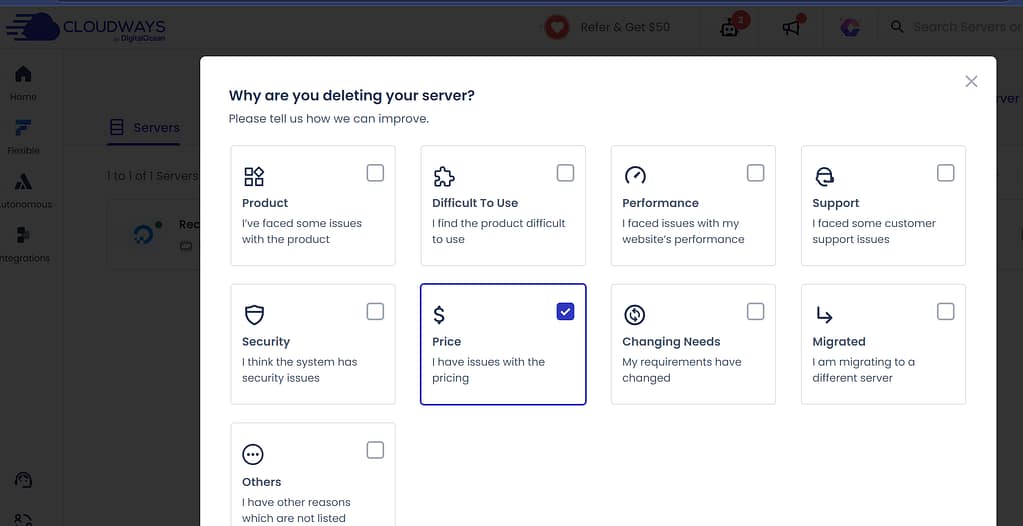
main reasons why i move cloudways..